The problem:

Ubuntu prompt me that 18.04 LST is available so I clicked Upgrade to initiate upgrade. When upgrade is completed, the system was rebooted and came back with lowest screen resolution you can ever imagine.

Fix

In summary…. This is only good for System 76 system. Looks like driver update was necessary. Anyhow…

So upgrade was completed

$ lsb_release -a
No LSB modules are available.
Distributor ID:	Ubuntu
Description:	Ubuntu 18.04 LTS
Release:	18.04
Codename:	bionic

and looks like I lost lsb module. so restoring that…

sudo apt-get install lsb-core
$ lsb_release -a
LSB Version:	core-9.20170808ubuntu1-noarch:security-9.20170808ubuntu1-noarch
Distributor ID:	Ubuntu
Description:	Ubuntu 18.04 LTS
Release:	18.04
Codename:	bionic

Download and install the current System76 Driver.

sudo apt-add-repository -ys ppa:system76-dev/stable
sudo apt-get update
sudo apt-get install -y system76-driver

If you ordered a system with a discrete NVIDIA graphics card, you will need to manually install the closed source drivers for your card to get the optimum performance. Please run the following command:

sudo apt install system76-driver-nvidia

Restart the computer and you should have your nice set of resolutions back.

Cheers!

The problem:

  • I don’t understand the difference between setup.py develop and setup.py install
  • I don’t understand the difference between setup.py develop and pip install -e [dir]
  • I don’t see the changes to my code when I import my code

The difference between setup.py develop and setup.py install

In short, you want to run setup.py develop when you are editing code because when you run setup.py install, it will copy your code into site-packages thus if you want to test your latest code you will need to install (copy) again. On the other hand, with develop, it creates a link to your source code so that when you import your code, it is your latest code.

Let’s take a look.

note: to keep it simple, I’m going to assume that you have created virtual environment and using python3.

cd ${project-dir}
python3 -m venv env
source env/bin/activate
pip install -U setuptools
easy_install --version
setuptools 38.5.1 from ${project-dir}/env/lib/python3.6/site-packages (Python 3.6)

setup.py develop simply creates a special .egg-link file in site-packages directory which links to your project’s source code.

$ cd ${project-dir}
$ python setup.py develop
$ ls -l env/lib/python3.6/site-packages | grep myproject
-rw-r--r--    1 nreeves  staff      44 Mar  5 14:11 myproject.egg-link
$ cat env/lib/python3.6/site-packages/myproject.egg-link
${project-dir}/src
../

When you list package, you can see it shows source directory instead of package name

$ pip list --format=columns | grep myproject
myproject                                0.1    ${project-dir}/src

and when you see path to source code, it is the file under my project folder and not inside site-package

>>> import myproject
>>> myproject.__file__
'${project-dir}/src/myproject/__init__.py'

Let’s uninstall that for now so that we can see what install will do. You can see it is simply removing .egg-link file

$ python setup.py develop --uninstall
running develop
Removing ${project-dir}/env/lib/python3.6/site-packages/myproject.egg-link (link to src)

Spoiler alert! if you run find . -name 'myproject.*', you will see residual but this is good enough for now.

Now to install with install. You will see build process then copying bunch of files to site-packages

$ python setup.py install
running install
running build
running build_py
...
copying build... -> ${project-dir}/env/lib/python3.6/site-packages/myproject/...
...

When you list package, you only see package name unlike the one with develop

pip list --format=columns | grep myproject
myproject                               0.1

and when you see path to source code, the path to the file is inside of site-packages

>>> import myproject
>>> myproject.__file__
'${project-dir}/env/lib/python3.6/site-packages/myproject/__init__.py'

So the reason you might not see your new code could be:

  • At one point you ran python setup.py install so make sure to remove them.
  • You made changes and forgot to restart the program. Python will load files when program started, compile it to bytecode and keep it internally.

But wait… instead of setup.py, use pip

It is highly recommended to use pip instead of setup.py. pip install . instead of setup.py install and pip install -e . instead of setup.py develop.

Because setup.py will do the wrong things for dependencies such as:

Cheers!

鉄則1:出費しながらお金を貰う

全ての買い物、ガソリンやビルの支払いはキャッシュバックもしくはポイント制のクレジットカードで支払いする。 ちなみに私はChaseの1.5%CashBack Bonusを使ってます。 毎月の出費が$1,000だとしたら$15、1年で$180の現金。

例外:クレジットカードの支払いをするとサーチャージをする販売会社があります。 このような時は現金やチェックの支払いの方が特です。

鉄則 2:クレジットカードの利子は絶対払わない

クレジットカードの使用限界を毎月完全に支払い出来る金額の抑える。これはちょっとしdiscipline が必要ですがこれは絶対に頑張らなければ大損(クレジットカードの利子は高過ぎ)するだけでなくお金持ち(金融) をもっとお金持ちにしてしまいます。

鉄則 3:クーポン、Rebateをフル活用

私はEbatesをフル活用してます。なぜならと〜っても簡単に使えるし10%リーベイトも稀ではないから。 ブラウザープラグインをインストールすると下のようなボタンをクリックするだけでなんとWalmartで10%引き。 だから今月はほとんどとWalmartで買い物でした。クレジットカードとの併用で11.5%引き。 年間の買い物をこんな感じでやったら$1,380 (assuming that your expense is $1,000 a month) もお得になっちゃう! このリンクをクリックしてアカウントオープンすると$10もらえます。

鉄則 4:お金は銀行講座で眠らせるない

現在銀行の利子はインフレーションレイト(毎年物価などが上がるレート。だいたい3%とされてます)より遥かに低いのは一目瞭然。 と言うことはお金をチェッキンぐにおいといたりすると毎年3%の価値を失っていくという事です。 そこで投資。色々な投資の仕方があるけど長い歴史をもついわゆるTraditional Investment (債権投資, 不動産,株式などに投資をし資本利得, 配当金や利子などという形で利益を得る)はリスクを最小に抑えることが出来ると信じてます。 アメリカでもっとも成功してる投資家 Warren Buffett 曰くTraditional Investmentのリターンレイトはだいたい6−7%と考えて良いとのこと。

例えば銀行に$1000あるとし、毎月$100貯蓄を10年間続けたとします。 現在チェイスのSaving Account Rateは0.1%以下です。が、0.1%vs10%のリターンの違いは以下のように凄い差です (レートは年率、コンパウンドで計算されてます)。

Place Money Sit Final Balance
Bank Saving Account $13,055.74
Traditional Investment $22,580.13

どこから始めればよい?

まず自分がどんな投資かになりたいか考えてください。 もし自分でストックのマーケットなどを勉強して投資対象を自分でハンドピックしたいなら Ameritrade や Robhinhood などのBrokerageを選択する必要があります。 Ameritrade の売買コミッション手数料は$6.95ですが Robhinhoodはコミッション手数料は無料です。

もし全ておまかせしたい人は Robo-Advisor をお勧めします。 Robo-Advisor は高度なアルゴリズムを用いた投資戦略で、資産配分や商品選定・発注、リバランスなどを、自分達に代わって行ってくれます。

Robo-Advisor の中でも違うのプラットフォームの選択肢があります。

一つは貯蓄したい金額を設定して定期的にお金を動かす方法。Betterment というBrokerageが一例です

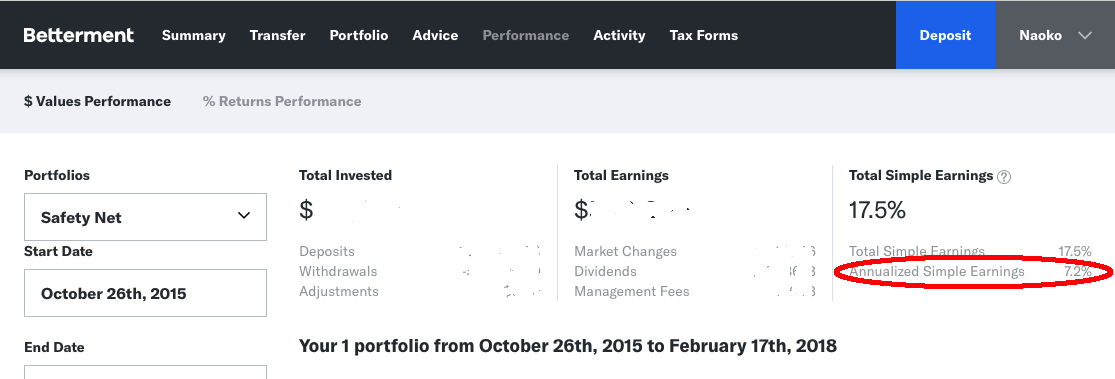
私はBettermentを2015年から使ってます。パフォーマンスは大まかMr. Buffettのアナリシスの通り(下の写真の)。

毎月いくら投資したいか設定して後は全部お任せ。 マネージメント手数料はアカウントの0.25%です。 このリンクをクリックしてアカウントをオープンすると最初の三ヶ月はこの手数料が wave されます。

もし毎月定額を投資する余裕があるならBettermentをお勧めします。 例えば毎週$25からとか毎月$50からとか自分のペースにあった投資ができます。

アカウントタイプの選択

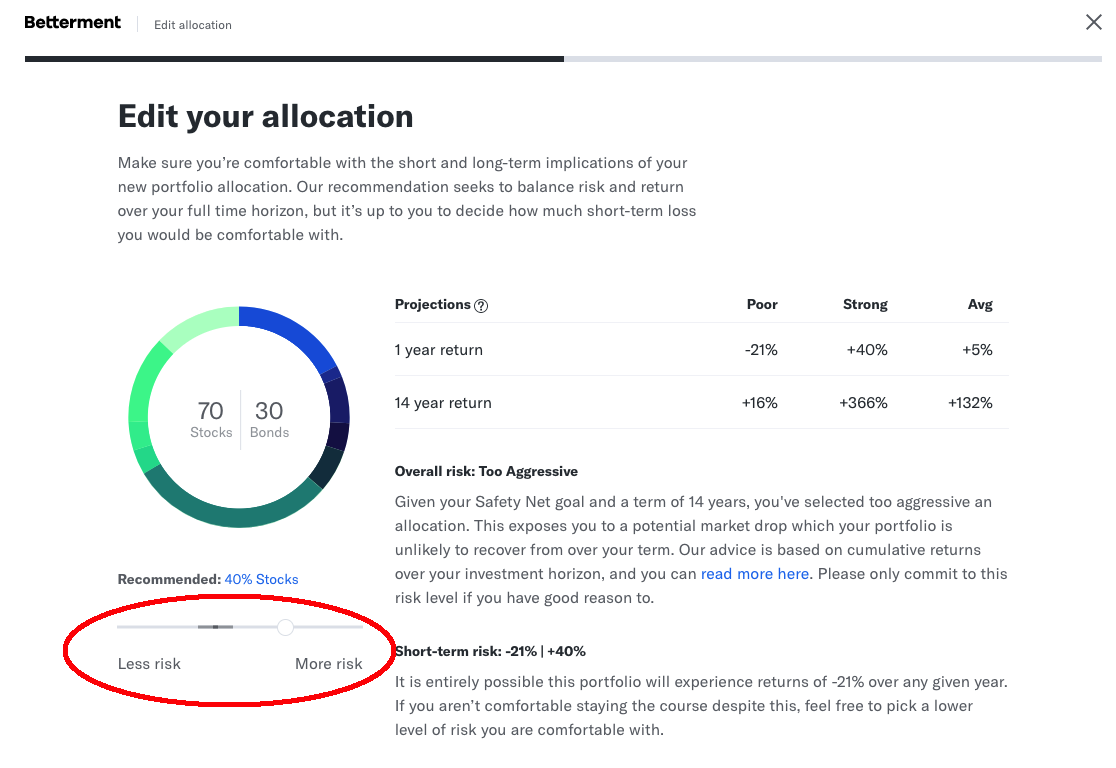
私はかなりアグレッシブに設定してますがアロケーション選択はスクロールバーを左右に動かすだけととっても簡単です。

もう一つはお金を使うたびにお金が動く方法。AcornというBrokerageが一例です。

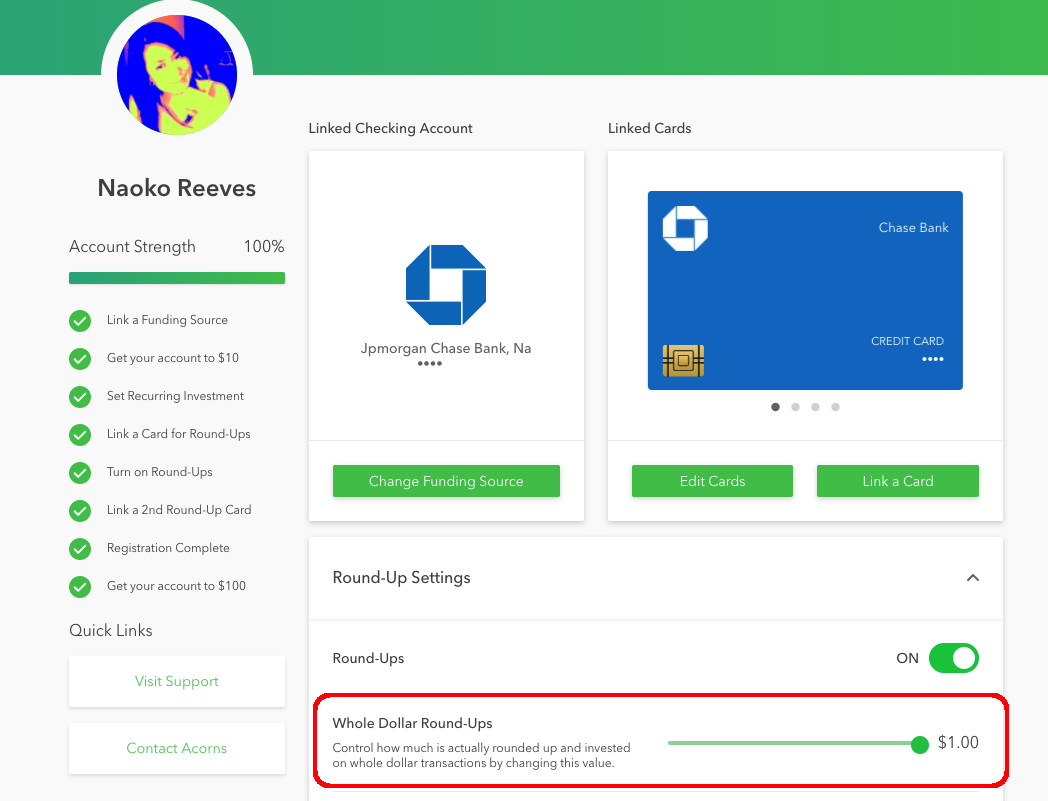
この方法はクレジットカードをリンクして残余を動かします。 例えば、設定が$1ラウンドアップ(see image below)だと、$9.50 使うと $0.50 がAcornに動きます。 マネージメント手数料はバランスが$5,000以下は月に$1でそれ以上であれば年率バランスの0.25%です。 まだ定期的な投資するのに心の準備ができてない人やおこずかい稼ぎを感がてる人にお勧めです。 このリンクをクリックしてアカウントをオープンすると $5もらえます(ちなみに私も)。

Cheers!

The Problem:

I love vagrant. I am so dependent on testing my ansible before I run against mutable boxes. Yes, I’m still living in place where Ops provision VM and the box stays mutable. It is okay though… change should be coming. Anyhow, I installed vagnrat on my new Ubuntu machine (ubuntu-17.10) but the version was 1.9. It was working fine until I upgraded the box to debian/stretch64. It says that The box 'debian/stretch64' could not be found. And noticed that it was trying to look in the old repo https://atlas.hashicorp.com instead of this https://app.vagrantup.com.

The Solution:

I’m sure specifying config.vm.box_url would have fixed it but why not upgrade to latest?

You can download from official site but I chose to use ppa provided by Wolfgang.

$ sudo bash -c 'echo deb https://vagrant-deb.linestarve.com/ any main > /etc/apt/sources.list.d/wolfgang42-vagrant.list'
$ sudo apt-key adv --keyserver pgp.mit.edu --recv-key AD319E0F7CFFA38B4D9F6E55CE3F3DE92099F7A4
$ sudo apt update
$ sudo apt install vagrant 
$ vagrant --version
Vagrant 2.0.1

If you have synced_folder configured then you might get the error says

Vagrant was unable to mount VirtualBox shared folders. This is usually
because the filesystem "vboxsf" is not available. This filesystem is
made available via the VirtualBox Guest Additions and kernel module.
Please verify that these guest additions are properly installed in the
guest. This is not a bug in Vagrant and is usually caused by a faulty
Vagrant box. For context, the command attempted was:

mount -t vboxsf -o uid=1000,gid=1000 srv_digicon /srv/digicon

The error output from the command was:

mount: unknown filesystem type 'vboxsf'

You can install guest additions as follows. (tested on ubuntu 16.4 and 17.10)

vagrant plugin install vagrant-vbguest

Cheers!

The Problem:

I was running Debian Jessie (debian 8) and the package I needed to install was in debian testing repo. So I added testing repo and installed the package (libsnappy1v5) and I got scold by my super sysadmin boss: “Naoko, don’t make a FrankenDebian!”

The Solution:

The package I needed is now available in Stretch (debian 9) stable so I need to upgrade to it.

First, I need to remove testing repo I’ve added

cd /etc/apt
grep -r testing *

This should find a file that lists testing repo. Get rid of it. In my case, the ansible script created the file here: /etc/apt/sources.list.d/ftp_us_debian_org_debian.list. So just ran rm sources.list.d/ftp_us_debian_org_debian.list

Then change jessie stable to stretch stable.

Edit sources.list with your favorite editor and replace jessie with stretch. My file look like this now:

# Line commented out by installer because it failed to verify:
# deb http://security.debian.org/ stretch/updates main
# Line commented out by installer because it failed to verify:
# deb-src http://security.debian.org/ stretch/updates main

deb http://ftp.us.debian.org/debian stretch main
deb-src http://ftp.us.debian.org/debian/ stretch main

deb http://security.debian.org/ stretch/updates main
deb-src http://security.debian.org/ stretch/updates main

deb http://ftp.us.debian.org/debian/ stretch-updates main
deb-src http://ftp.us.debian.org/debian/ stretch-updates main

Then you want to update all packages with stretch stable

apt update
apt upgrade

apt upgrade will NOT generally install new releases, where major changes (including removal of packages or GRUB update is required). For example, when a new Linux kernel is available, the package will not get installed. In order to install the new kernel, you will need to run apt dist-upgrade.

apt dist-upgrade

Then reboot machine

reboot

When it comes back, verify version:

$ cat /etc/debian_version
9.3

Yay