The Goal:
You got blog going with Blogger and now ready to setup custom domain!
How to setup custom domain?
First, you will need to register your domain. To register your domain, you want to go through domain registrar. To become the domain registrar, you will need ICANN Acrediation so you want to go ahead register through registrar instead of becoming one.
Now there are many of them out there. The popular ones are likely GoDaddy. I see Google is providing this service too. I decided go to with NameCheap.com for a few reasons:
- The company mission to stand for Internet Freedom
- Great pricing
- Free WhoisGuard forever so your data is protected from whois database.
Now you’ve registered your domain. What’s next?
- Sign in to Blogger.
- From Upper left drop-down, Select the blog you want to update
- On the left menu, click Settings and then Basic.
- Under “Publishing,” click “+ Setup a 3rd party URL for your blog”.

- Type the URL of the domain you’ve purchased.
- Click Save.
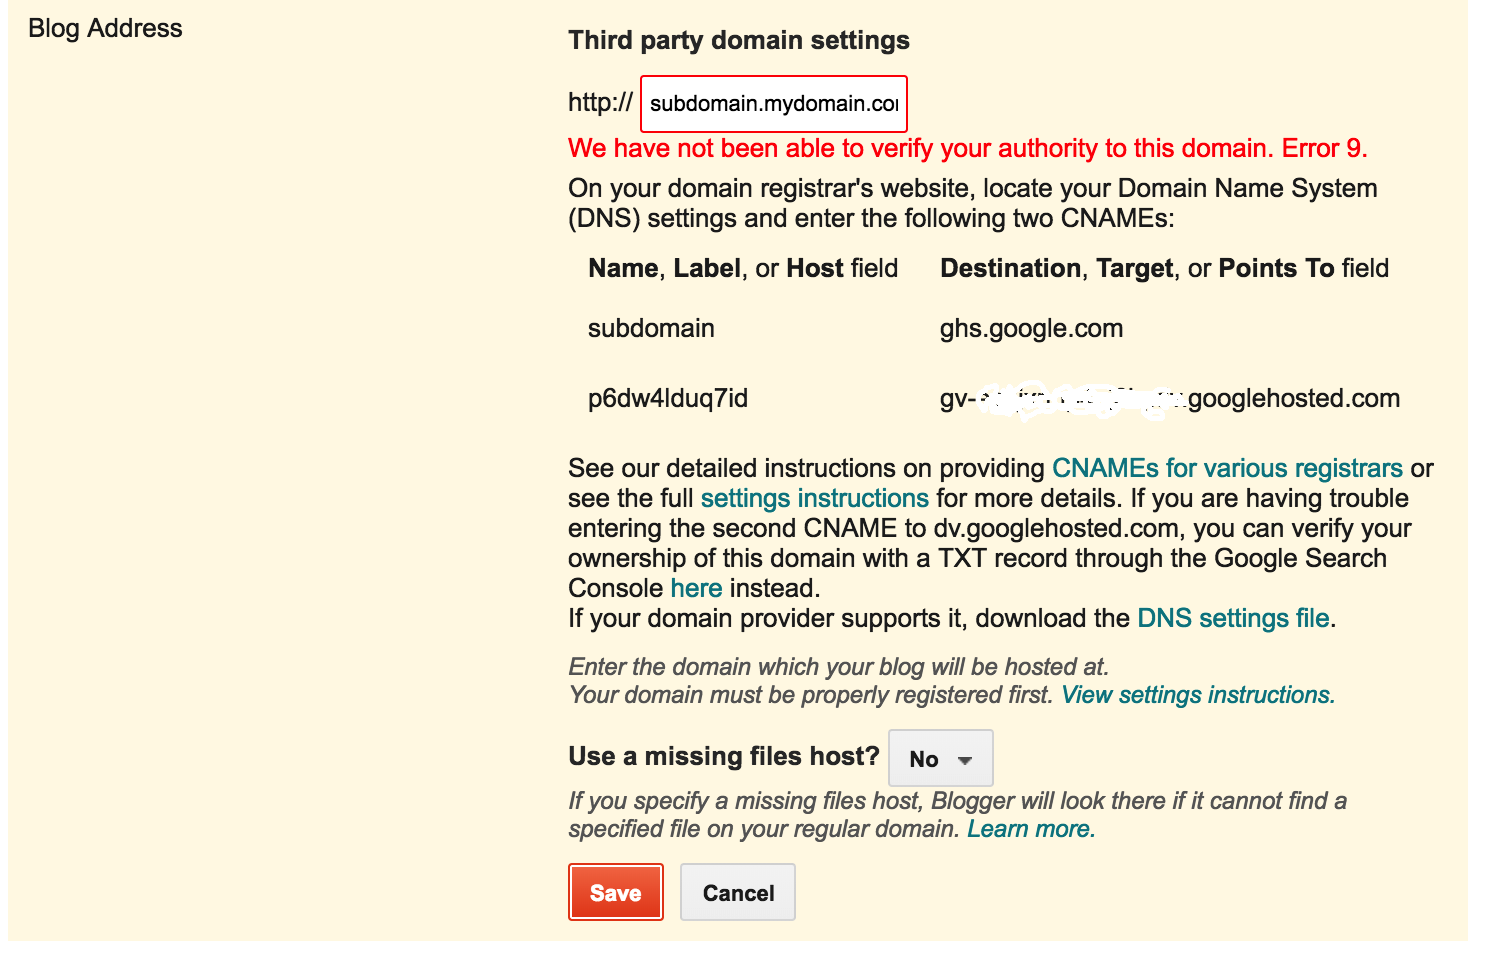
- You’ll see an error with two CNAMEs.

On “Name, Label or Host” column, 1st row it should show the subdomain you entered, like “blog” or “www”. For the case of this example, it is “subdomain” For destination, it should show “ghs.googlehosted.com” and common to everyone.
On 2nd row destination, it is s different for each person and is specific to your blog and your Google Account.
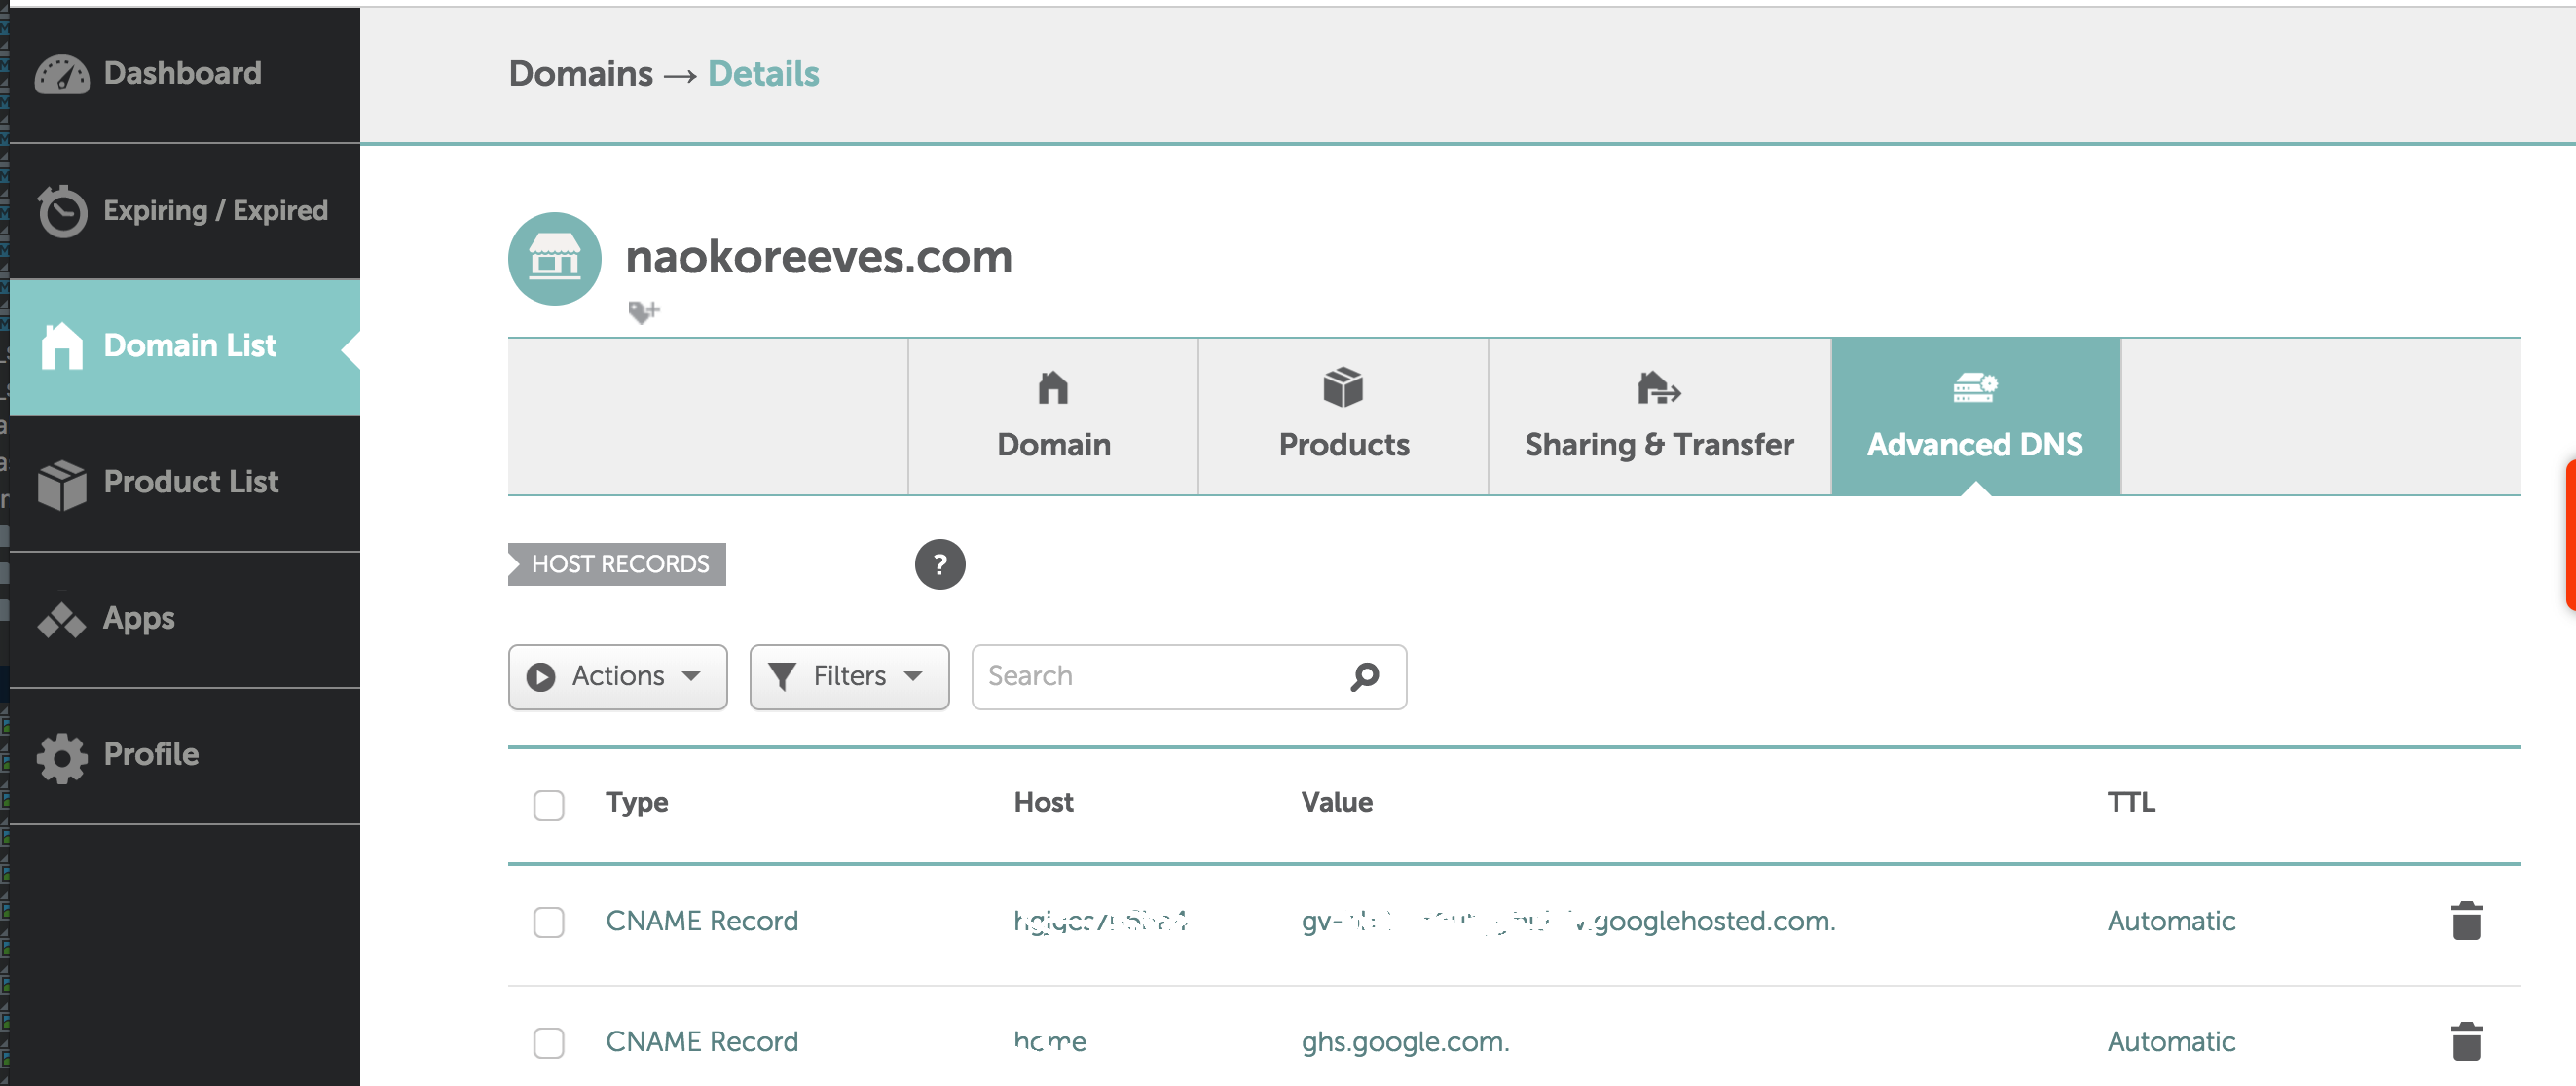
- Now login to Cheapname and go to dashboard -> Domain List -> Advanced DNS

- Click “Add New Record” link at the bottom and select “CNAME Record”
- Enter value from “Name, Label or Host,” on Blogger as Host
- Enter value from “Destination, Target or Points to,” on Blogger which is “ghs.googlehosted.com” as value.
- Repeat the same for 2nd row on Blogger
- Wait for at least an hour for your DNS settings to activate.
- Repeat steps 1 through 5. Once you click ‘save’ (step 5) You should not get an error this time. Your blogspot.com address will redirect to your custom domain. It may take to 24 hours.
Cheers!